Zimbra Mobile Installation and Setup for iPhone
Zimbra Mobile Installation and Setup for iPhone
Zimbra Collaboration Server Network Edition with Zimbra Mobile enabled integrates natively over-the-air with the Mail, Contact and Calendar applications on any Apple iPhone, iPod Touch or iPad. By using the ActiveSync protocol no additional download is required, only that Wi-Fi or a wireless data plan is enabled. After a simple configuration step users can work virtually anywhere with their Zimbra account on the go.
You can use the Apple iPhone to access your Zimbra account three primary ways:
- Entering Zimbra Mobile settings for email, contact and calendar sync
- View Zimbra in the Safari mobile web browser
- Entering IMAP/POP3 email settings
For more information about ActiveSync, go to http://en.wikipedia.org/wiki/ActiveSync
Important: Performing the following steps can delete all of the existing contacts on your iPhone. This is a common problem for iPhone users when creating a new ActiveSync account. You should ensure that you have backed up all of your contacts before proceeding.
Installation and Setup for iPhone
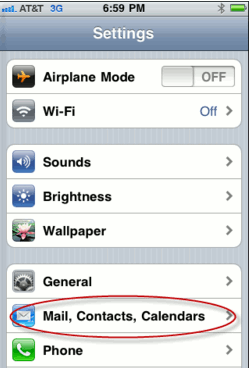
1. On your iPhone Home screen, tap the Settings icon (the Gears icon). Scroll down and select Mail, Contacts, Calendars.
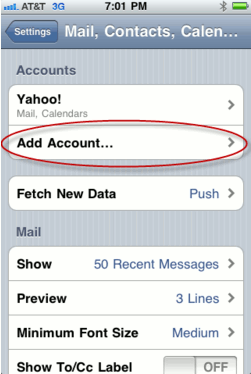
2. Select Add Account.
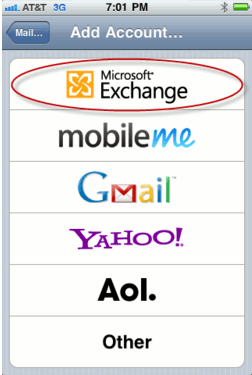
3. Choose Microsoft Exchange.
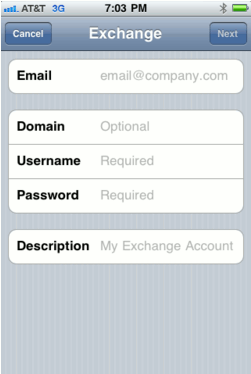
4. Enter your account information.
Email. This is your company email address (for example, user@company.net)
Domain. This is your company's email server domain (for example, mail.company.net... the *same base URL you type in the browser for the Zimbra Web Client). For a simple explanation of a domain, see http://computer.howstuffworks.com/dns2.htm.
Username. This is the Zimbra username of your account; the same one you use to log in to the Zimbra Web Client (for example, user@company.net)
Password. This is your Zimbra password (the same one used for the Zimbra Web Client)
Use SSL. You will see an On/Off slider for SSL. Your administrator can tell you more about SSL and if you need to use it, but typically if you access your Zimbra Web Client using a URL beginning with https:// then you want SSL set to On. For a simple explanation of SSL, see http://computer.howstuffworks.com/encryption4.htm.
Click Next.
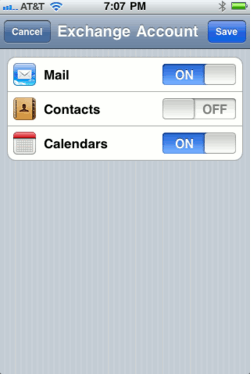
5. Select to synchronize Mail, Contacts, and/or Calendars by setting the sliders to On.
