Difference between revisions of "Accessing Zimbra on your Mobile Device"
| (36 intermediate revisions by the same user not shown) | |||
| Line 1: | Line 1: | ||
| − | == Accessing Zimbra on your Mobile Device == | + | == Accessing Zimbra on your Mobile Device (POP) connection == |
| + | * The following settings below are to receive your email by using a '''POP''' connection. We recommend users to use a '''IMAP''' connection if they plan to check and receive their email on muliple different devices. | ||
* You can set-up your Zimbra account on any mobile device (smartphone, iPad, etc.). | * You can set-up your Zimbra account on any mobile device (smartphone, iPad, etc.). | ||
| Line 10: | Line 11: | ||
* Email Clients on your Mobile Device, The email client (the program that allows you to access email accounts) on your mobile device is very similar to the one on your computer. | * Email Clients on your Mobile Device, The email client (the program that allows you to access email accounts) on your mobile device is very similar to the one on your computer. | ||
| − | Use the following information below to configure your email on your mobile device | + | * Use the following information below to configure your email on your mobile device. |
| − | == Exchange Connection ( | + | == Exchange Connection (is recommended for receiving email by POP) == |
*When configuring Zimbra with an email client on your mobile device the best type of connection to use is '''Microsoft Exchange''' (or simply Exchange). This will sync email, contacts and calendars from your Zimbra account to your mobile device. | *When configuring Zimbra with an email client on your mobile device the best type of connection to use is '''Microsoft Exchange''' (or simply Exchange). This will sync email, contacts and calendars from your Zimbra account to your mobile device. | ||
| − | To set up an Exchange connection to your mobile device, use the following steps: | + | * To set up an Exchange connection to your mobile device, use the following steps: |
* From your Phone Home screen, select the '''Applications''' tab | * From your Phone Home screen, select the '''Applications''' tab | ||
| Line 26: | Line 27: | ||
[[File:Andriod2.gif]] | [[File:Andriod2.gif]] | ||
| − | Add a new mail account, | + | * Add a new mail account, Enter your '''email address''' first and then your '''password''' and then click on '''"Manual set up"''' or if thats not a option just click next. |
| − | |||
| − | |||
[[File:Andriod3.gif]] | [[File:Andriod3.gif]] | ||
| Line 38: | Line 37: | ||
* Enter the exchange server settings in the appropriate fields: | * Enter the exchange server settings in the appropriate fields: | ||
| − | Domain\Username | + | Your Domain\Username |
| − | Password | + | Your Password |
| − | Exchange Server | + | And Exchange Server as seen in image below |
[[File:Andriod5.gif]] | [[File:Andriod5.gif]] | ||
| Line 50: | Line 49: | ||
You are almost there now... | You are almost there now... | ||
| − | * Next it may ask you to Select the Email checking frequency dropdown. | + | * Next '''it may''' ask you to Select the Email checking frequency dropdown. |
[[File:Andriod6.gif]] | [[File:Andriod6.gif]] | ||
| − | * Select the desired frequency. | + | * Select the desired frequency. Push also called POP is one type |
[[File:Andriod7.gif]] | [[File:Andriod7.gif]] | ||
| Line 75: | Line 74: | ||
Sync contacts from this account. | Sync contacts from this account. | ||
| − | '''(Note)''' You mostly likely need to use the following information in the configuration process: | + | '''(Note)'''If you select Contacts, you may be asked whether you want to keep or delete the contacts already on your phone. |
| + | Make sure you choose to keep your existing contacts on your phone. | ||
| + | |||
| + | [[File:Andriod11.gif]] | ||
| + | |||
| + | * Enter an account name and outgoing message name then select '''Done'''. | ||
| + | |||
| + | Select the services (Email, Calendar and Contacts) that you would like to sync to your phone. | ||
| + | |||
| + | Finish set-up. | ||
| + | |||
| + | '''(Note)''' You will mostly likely need to use the following information in the configuration process to any type of smart phone: Click on next or proceed once you have completed entering the information for each stage of the process | ||
*Email: '''your email address''' | *Email: '''your email address''' | ||
| Line 84: | Line 94: | ||
*Description: '''The account's name in your email client''' | *Description: '''The account's name in your email client''' | ||
| + | If you acquire anymore assistance, our support team can help you through the configuration process, | ||
| + | |||
| + | You can contact Support at: 01 2805000 | ||
| − | |||
| − | |||
| − | |||
| − | |||
[[Category:Zimbra]] | [[Category:Zimbra]] | ||
Latest revision as of 15:43, 29 May 2012
Accessing Zimbra on your Mobile Device (POP) connection
- The following settings below are to receive your email by using a POP connection. We recommend users to use a IMAP connection if they plan to check and receive their email on muliple different devices.
- You can set-up your Zimbra account on any mobile device (smartphone, iPad, etc.).
- The following steps are more suited to a android phone, Due to the large number of different mobile devices in production, and the fact that they are constantly being changed and updated, IE Internet cannot support specific details for each mobile device out there, but our support team we will happily assist you through the process.
- However, the basic set-up of email on your device will be similar to the process for your computer. Iphone, Ipad and so on.
- Email Clients on your Mobile Device, The email client (the program that allows you to access email accounts) on your mobile device is very similar to the one on your computer.
- Use the following information below to configure your email on your mobile device.
Exchange Connection (is recommended for receiving email by POP)
- When configuring Zimbra with an email client on your mobile device the best type of connection to use is Microsoft Exchange (or simply Exchange). This will sync email, contacts and calendars from your Zimbra account to your mobile device.
- To set up an Exchange connection to your mobile device, use the following steps:
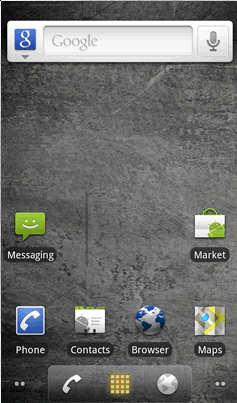
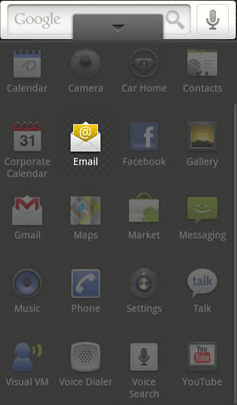
- From your Phone Home screen, select the Applications tab
- Select Email.
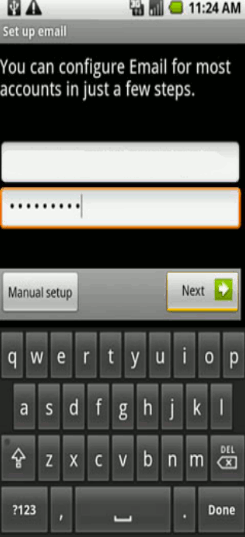
- Add a new mail account, Enter your email address first and then your password and then click on "Manual set up" or if thats not a option just click next.
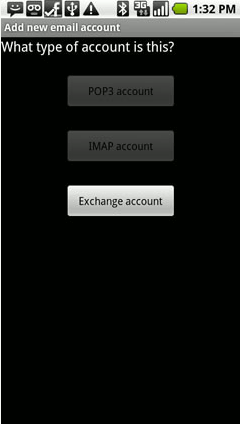
- It may then ask "What type of account", choose (Microsoft Exchange ActiveSync)
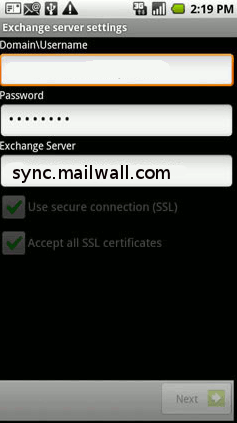
- Enter the exchange server settings in the appropriate fields:
Your Domain\Username
Your Password
And Exchange Server as seen in image below
- Next If desired, ensure Use secure connection (SSL) and Accept all SSL certificates are checked then click Next
You are almost there now...
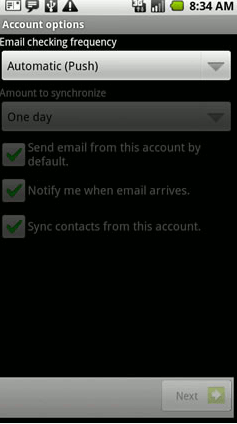
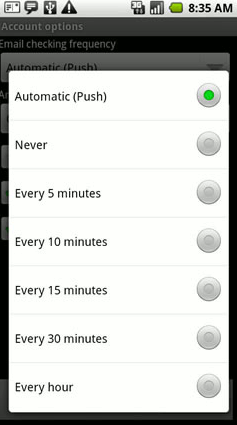
- Next it may ask you to Select the Email checking frequency dropdown.
- Select the desired frequency. Push also called POP is one type
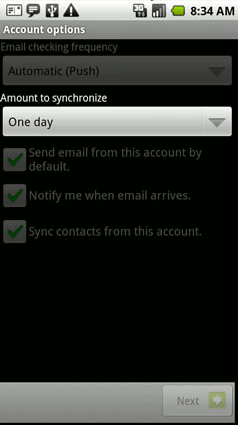
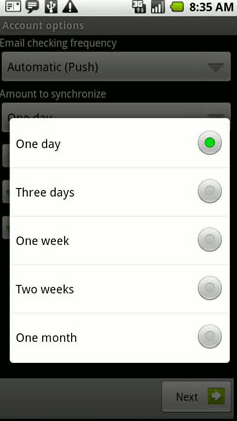
- Select the Amount to synchronize dropdown.
- Select the desired amount.
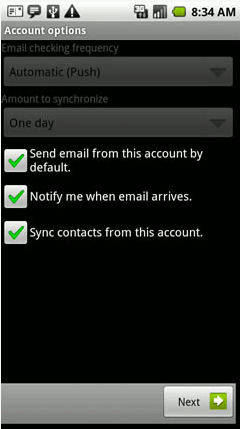
- Select the desired account options then select Next.
Note The account option is enabled if a green check mark is present.
Send email from this account by default.
Notify me when email arrives.
Sync contacts from this account.
(Note)If you select Contacts, you may be asked whether you want to keep or delete the contacts already on your phone. Make sure you choose to keep your existing contacts on your phone.
- Enter an account name and outgoing message name then select Done.
Select the services (Email, Calendar and Contacts) that you would like to sync to your phone.
Finish set-up.
(Note) You will mostly likely need to use the following information in the configuration process to any type of smart phone: Click on next or proceed once you have completed entering the information for each stage of the process
- Email: your email address
- Domain username: your domain username
- Exchange Server: sync.mailwall.com
- Username: your username
- Password: your password
- Description: The account's name in your email client
If you acquire anymore assistance, our support team can help you through the configuration process,
You can contact Support at: 01 2805000
